Posted on

Top tips on how to paint your garden shed

Protek Royal Exterior

Painting a shed can be a fun and rewarding DIY project that can transform the look of your outdoor space. Whether you’re looking to add a pop of colour to your garden or simply want to freshen up the look of your shed, a fresh coat of paint can make a big difference. Here’s a step-by-step guide on how to re-paint a shed:

  1. Prepare the surface: Before you start painting, it’s important to properly prepare the surface of the shed. Begin by cleaning the shed thoroughly, removing any dirt, dust, or cobwebs that may have accumulated. You can use a pressure washer, a scrubbing brush, or a garden hose to remove any debris. Once the shed is clean, use a putty knife or scraper to remove any peeling or flaking paint. If the shed has any holes or cracks, fill them in with wood filler.
  2. Sand the shed: Once you’ve prepared the surface of the shed, it’s time to sand it. Sanding will help to create a smooth surface for the new paint to adhere to. Use a medium-grit sandpaper and sand the entire surface of the shed, including the door and window surrounds.
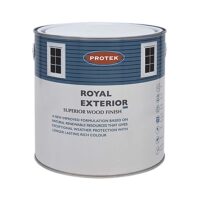
  3. Paint the shed: Now it’s time to apply the paint. Choose a high-quality exterior paint (we recommend Protek Royal Exterior that is specifically designed for use on sheds and other outdoor structures). Use a paintbrush or roller to apply the paint, starting with the door and windows and working your way outwards. Be sure to apply the paint in thin, even coats, and allow each coat to dry completely before applying the next. Depending on the size of your shed and the type of paint you’re using, you may need to apply multiple coats to achieve the desired coverage.
  4. Finish up: Once you’ve applied the final coat of paint, allow the shed to dry completely before adding any hardware or decorations. If you’re using a brush to paint, be sure to clean it thoroughly with soap and water to remove any paint residue. If you used a roller, simply dispose of it according to the manufacturer’s instructions.

Painting a shed can be a time-consuming project, but the end result is well worth the effort. By following these steps, you can transform the look of your shed and create a beautiful and functional space that will last for years to come.

Posted on

Top Tips for a Top Shed!

Most seasoned gardeners will have completed their garden chores by this time of year and are enjoying the calm before the seasons change and it is time to spring in to action!

There is one place which often gets overlooked unless you are a “sheddie” and that is the garden shed. Often neglected, it is the loft of the garden and for some less of a garden haven and more of a dumping ground for garden tools and equipment.

So let’s take a look at our top tips!

  • Take stock of your sheds contents – we have all got gadgets and gizmos bought on a whim that we do not use. So have a de-clutter and only keep items that you will use this year. If you have not used it the chances are you will not miss it!
  • Do your garden tools use batteries? The cold UK weather can reduce the batteries ability to maintain its charge so make sure you fully charge the battery before storing tools over the winter.
  • Keeping your shed clutter free will also help keep your shed pest free so give the floor a good thorough clean and sweep. Pests will happily use anything stored incorrectly as nesting materials. Inspect corners, crevices, ceilings for urine or droppings – these are clear indicators of infestation so keeping your shed clean and tidy will help avoid an issue with unwanted visitors.
  • Let in the light! – cleaning windows will not only allow extra light to enter your shed but will help keep your shed warm.
  • Organisation is key! When it comes to your garden shed layout you need to think practically – perhaps storing your tools and garden equipment on shelves or hooks would make them easily accessible and keep your sheds floor space clear for larger items. You need to be able to navigate your sheds easily without risk of hurting yourself by tripping over cables and mowers! Adequate storage is a must if you wish to stay organised!
  • Treat your building annually.
    So the inside is sorted but the outside still needs a bit of winter maintenance- remember to treat your shed annually. With most wooden sheds the key to keeping the building in top condition is protecting against moisture penetration by sealing your windows and using a good quality water resistant treatment. Keep your roof in good order – inspect and repair any damaged felt as to avoid any leaks!

These are just a few basic tips for a tidy shed for more tips and advice please visit > www.skinnerssheds.co.uk/blog/